After my relationship ended with my ex, I moved in with my buddy. My current living situation is a small bedroom for myself. All the stuff that I owned which previously fit into an 1800 SF condo had to go to storage. I've been working off my Razer laptop for a while now but I've been meaning to get back onto a desktop. As a lifelong desktop user, a switch to a laptop was somewhat inconvenient. With very little room, I decided to DIY a bedside desk.

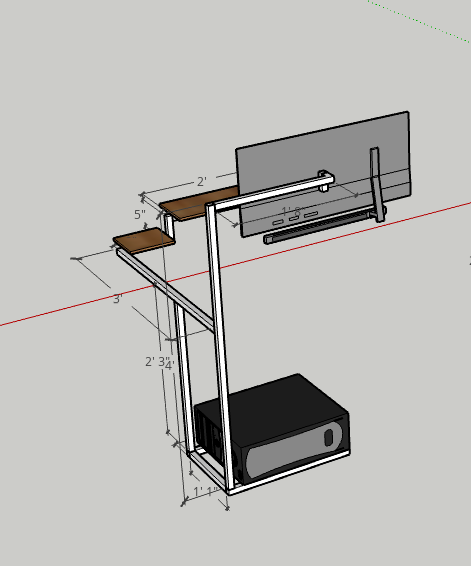
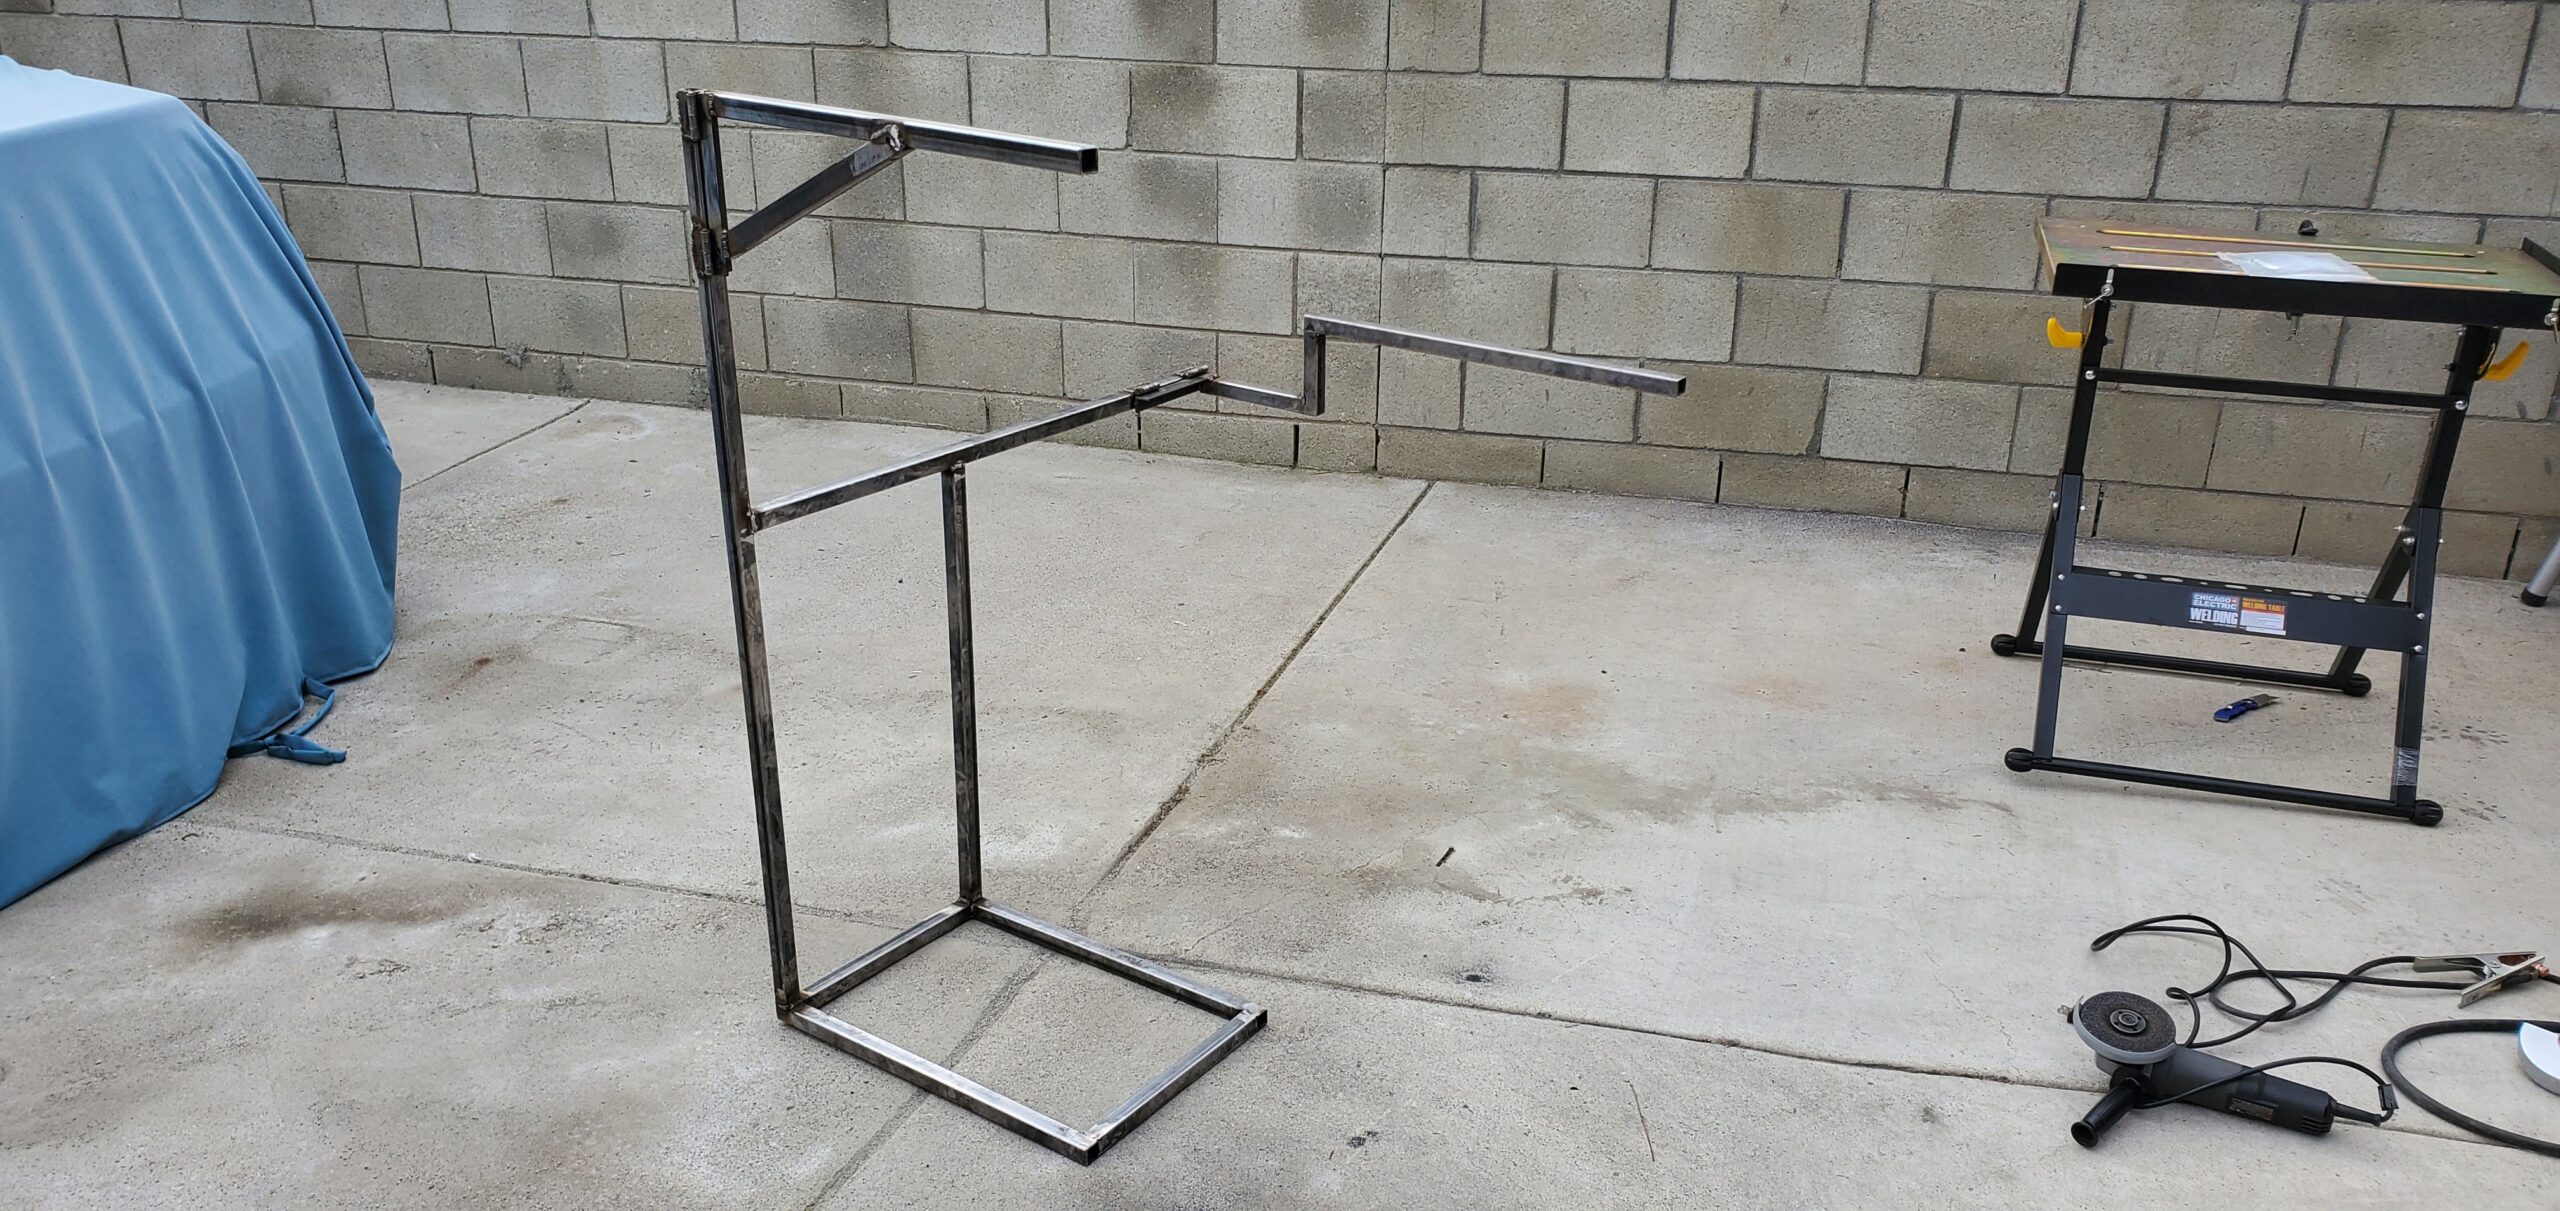
The original drawing seemed very unbalanced and looked like it would tip over. There was too much weight on the side of the monitor even with the computer at the base of the frame. I revised the design and redistributed the weight around.
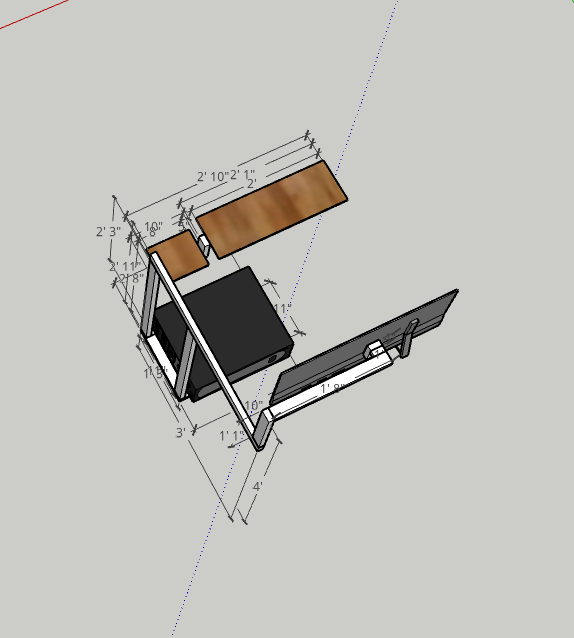
Version 2 saw the keyboard and mouse arm extended out and the monitor arm upright. This was a much better distribution of weight.
Not included in my design drawings were hinges to make the monitor and keyboard arm swing away from the bed. This gives me my bed space when I'm not on my desktop.

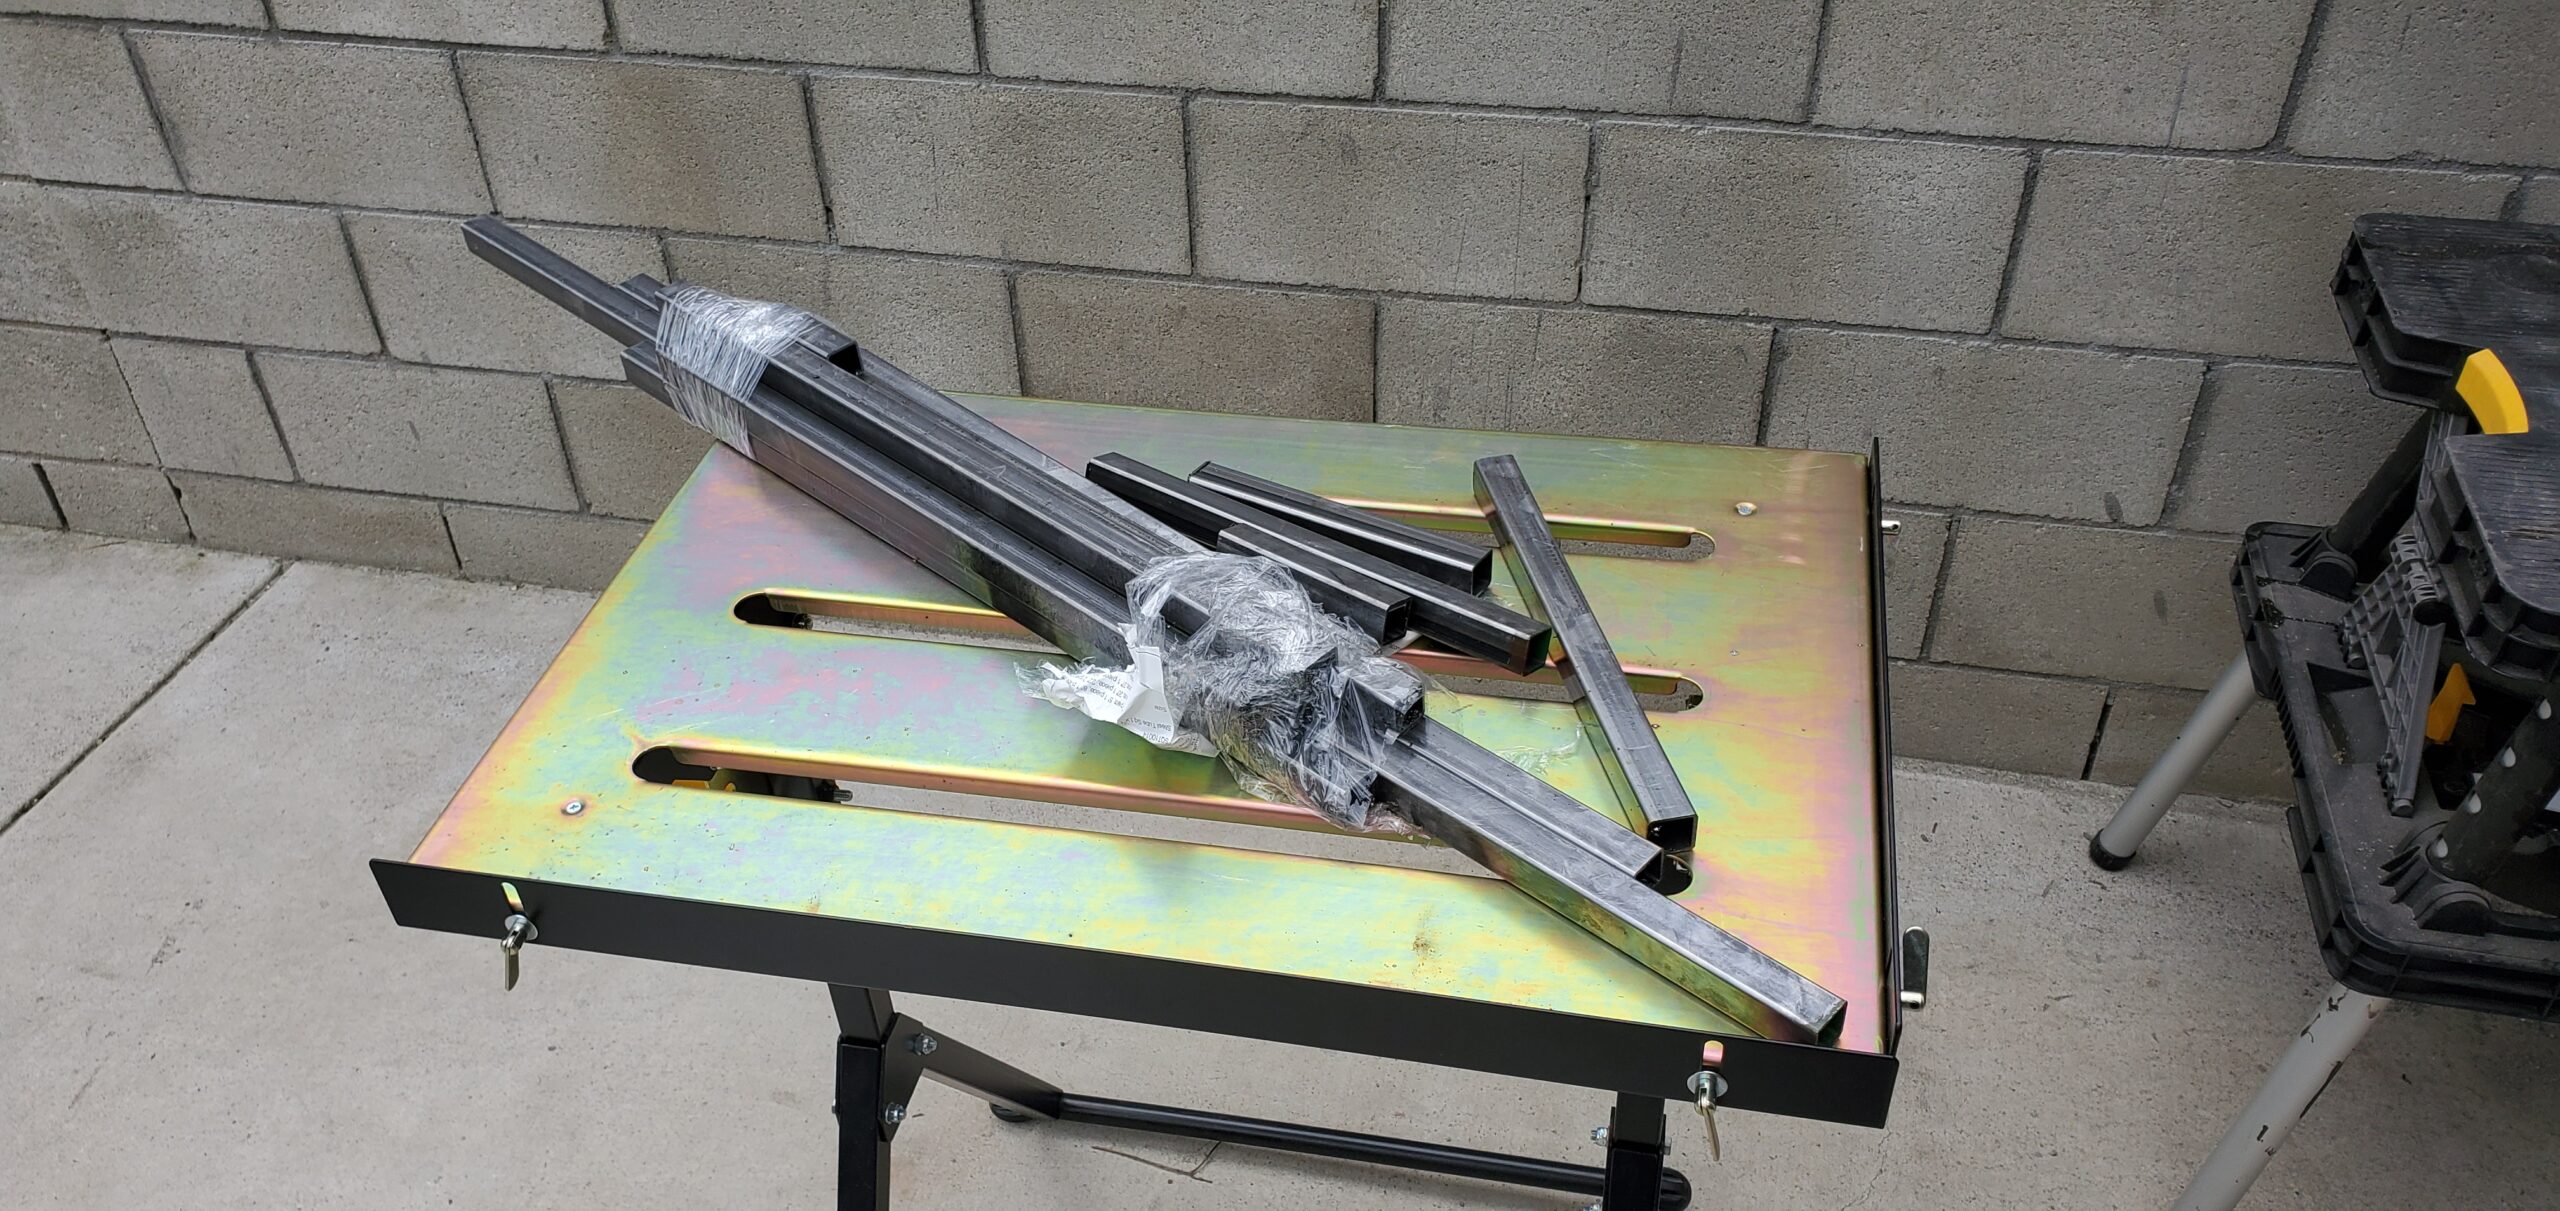
With my design ready, I sent the cut dimensions over to Industrial Metal Supply in Burbank for a quote. The entire design was cut from a 20 foot 1"-14 gauge square tube. The tube including the specified cuts cost me about $50. Paying the extra money to have them cut down the tube saved me time and headaches. This is especially true if you don't own a metalwork bandsaw or a chop saw. You can make the cuts with an angle saw, but you'll spend a lot of time making the cuts square and cleaning the edges.

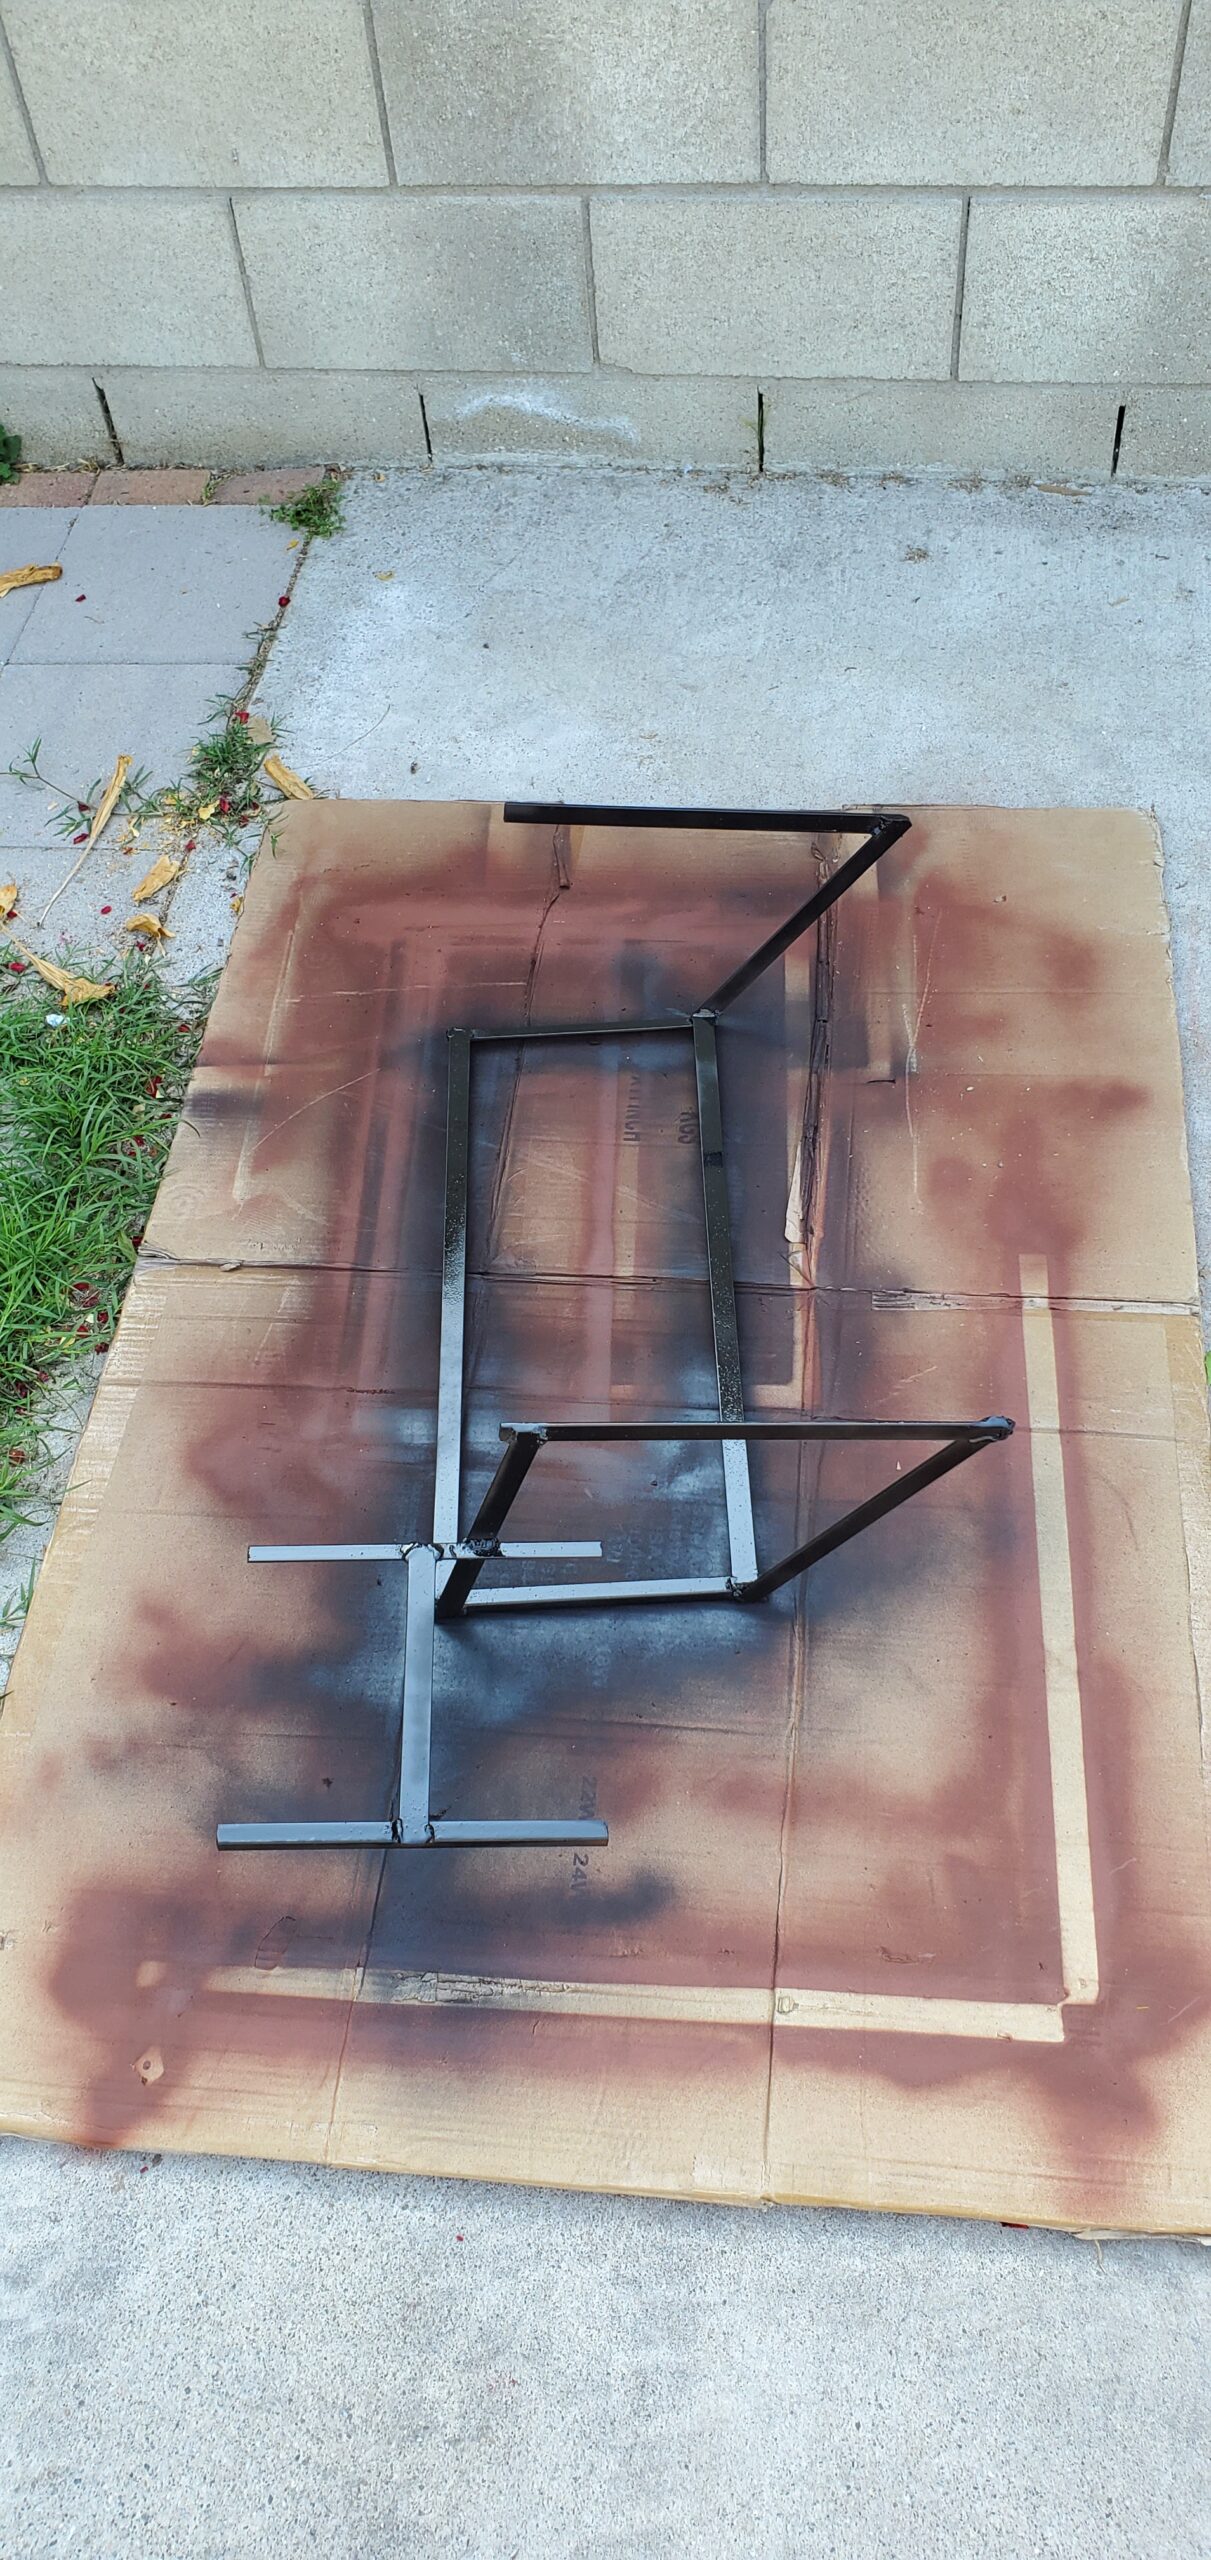
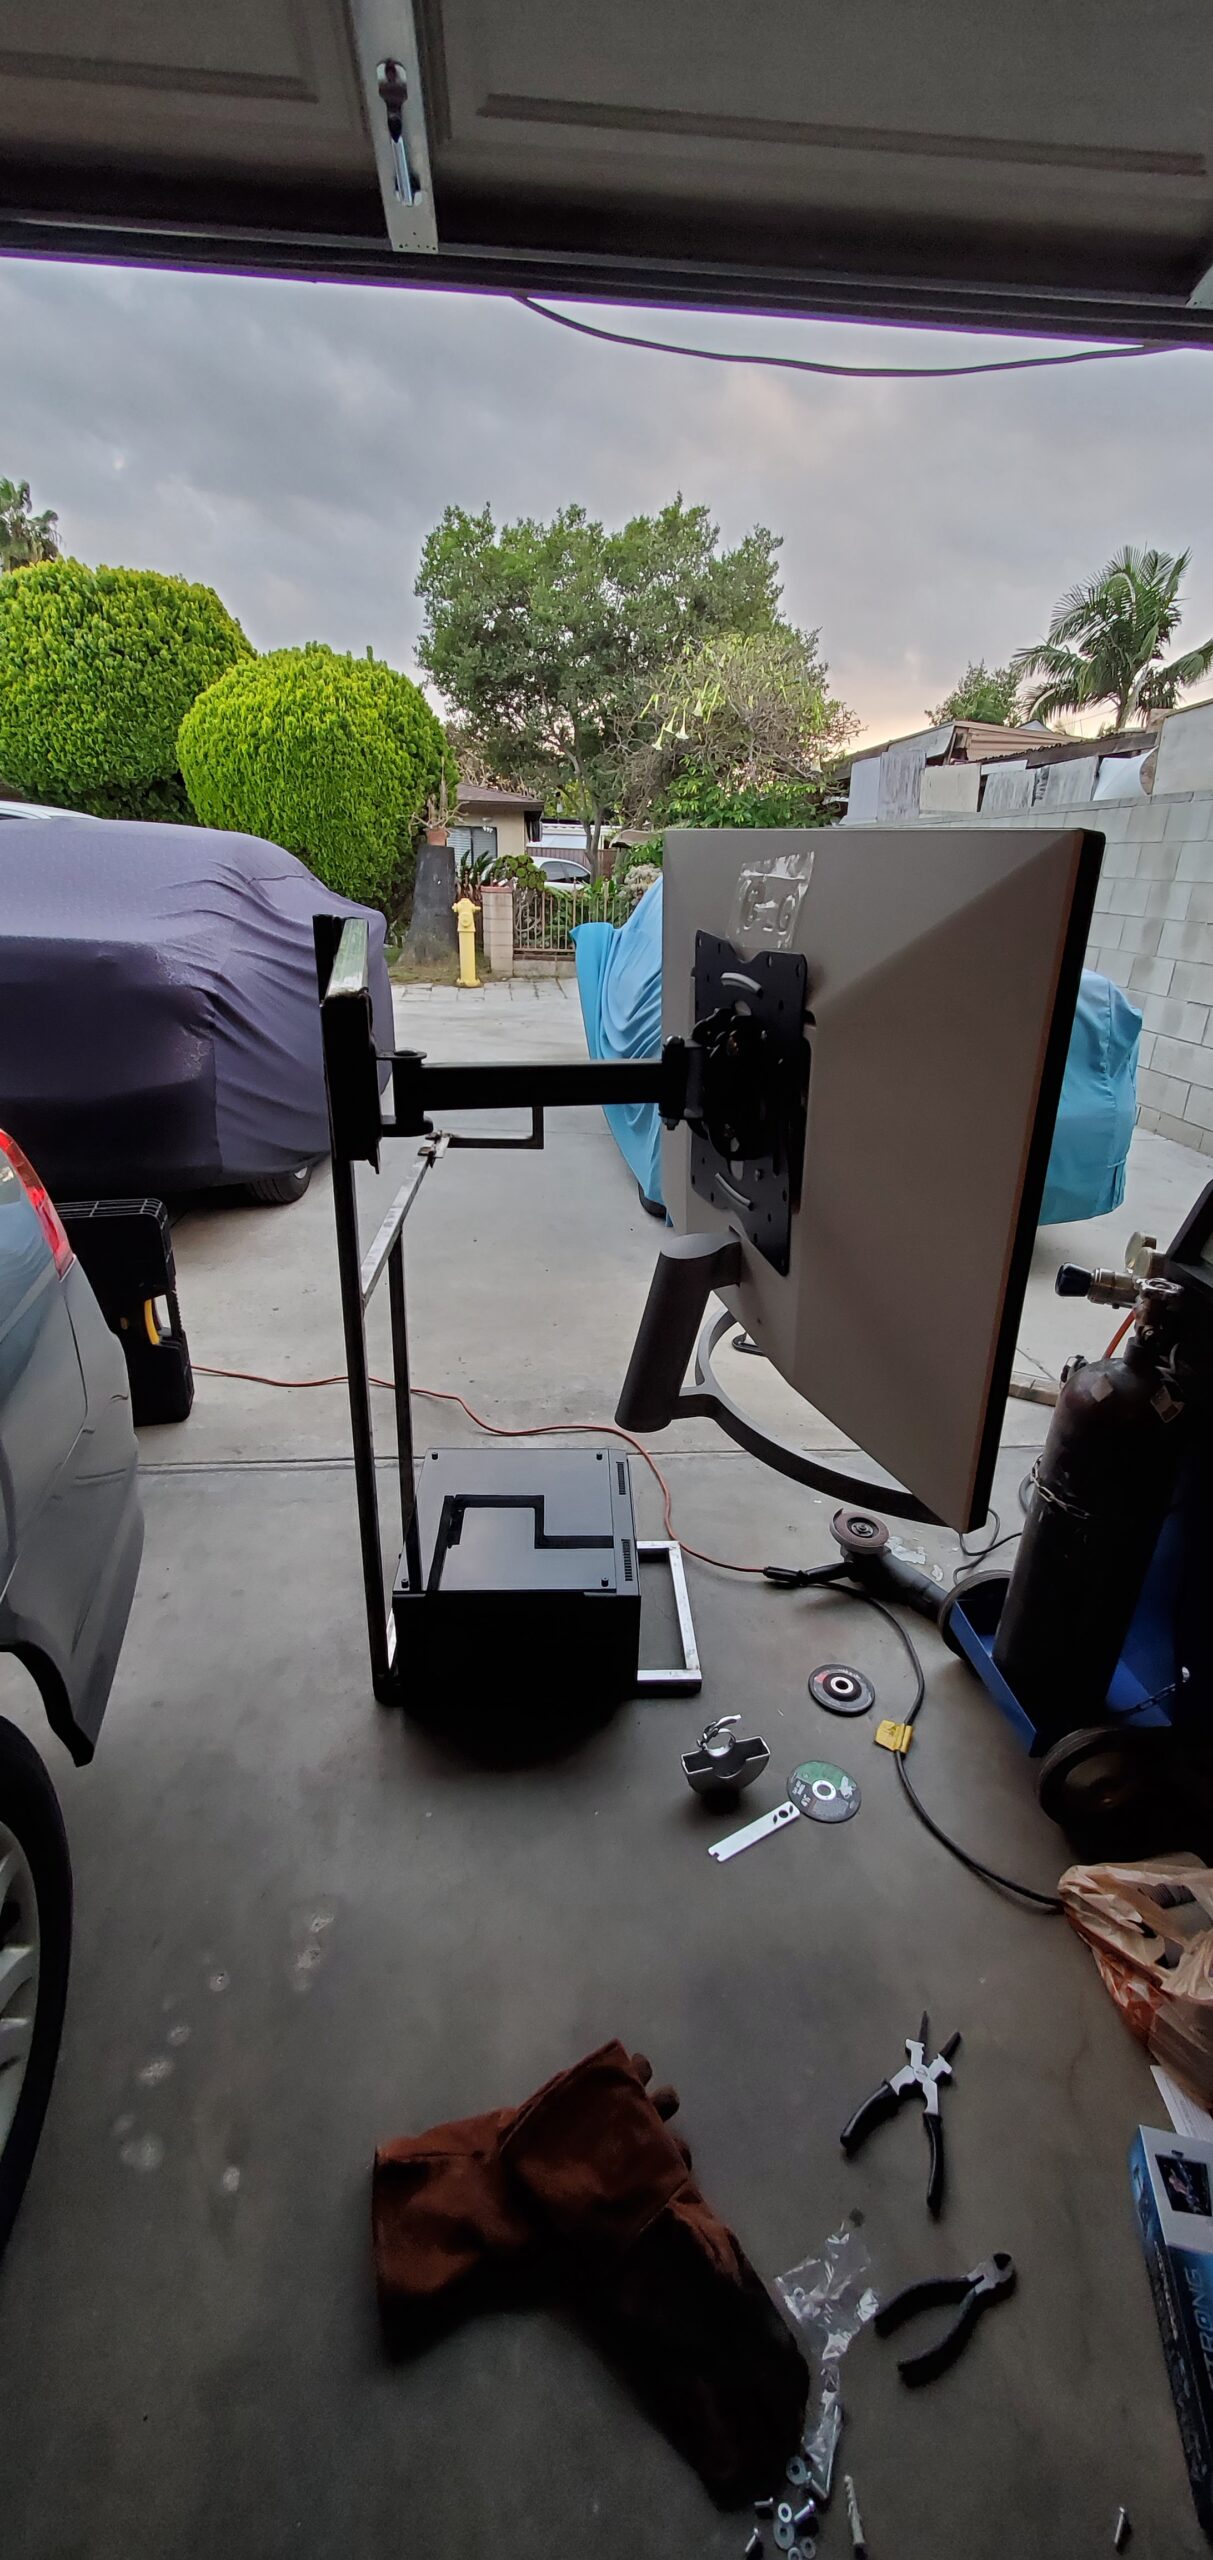
With all the pieces in hand, I got to welding. My original thought was to add a single hinge per swing. This made the arms very unstable. The heat from the welds ended up deforming the hinges as well. I added a single hinge to both arms and connected it with an angle steel. The arms were much more sturdier and can withstand the weight of me pulling down on it.

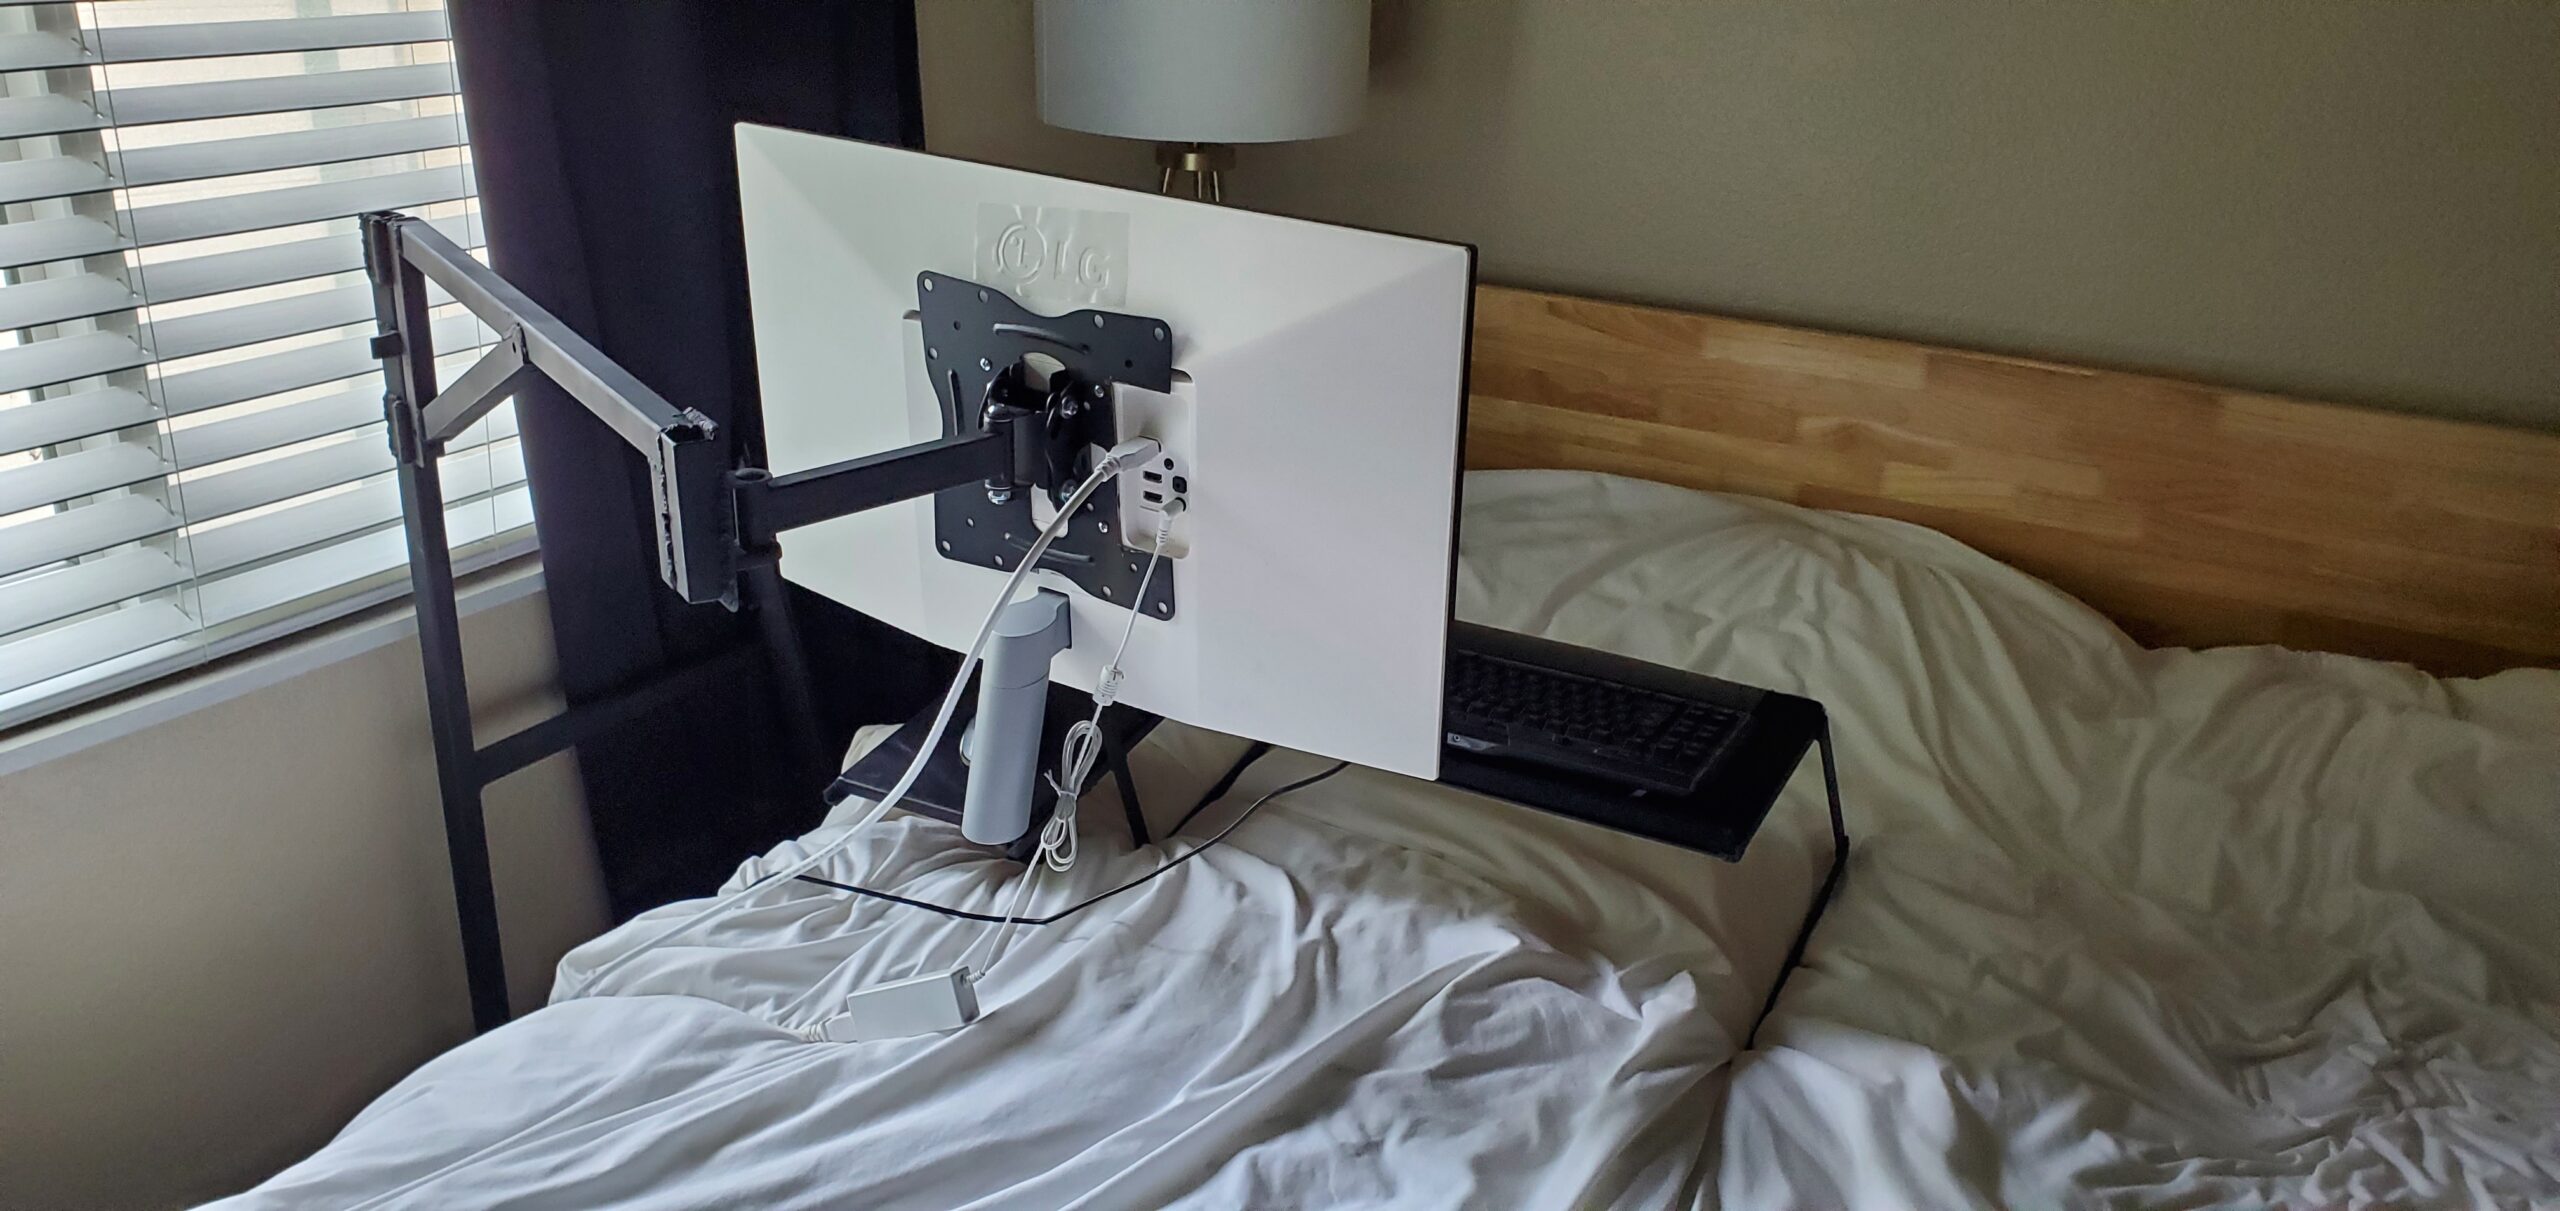
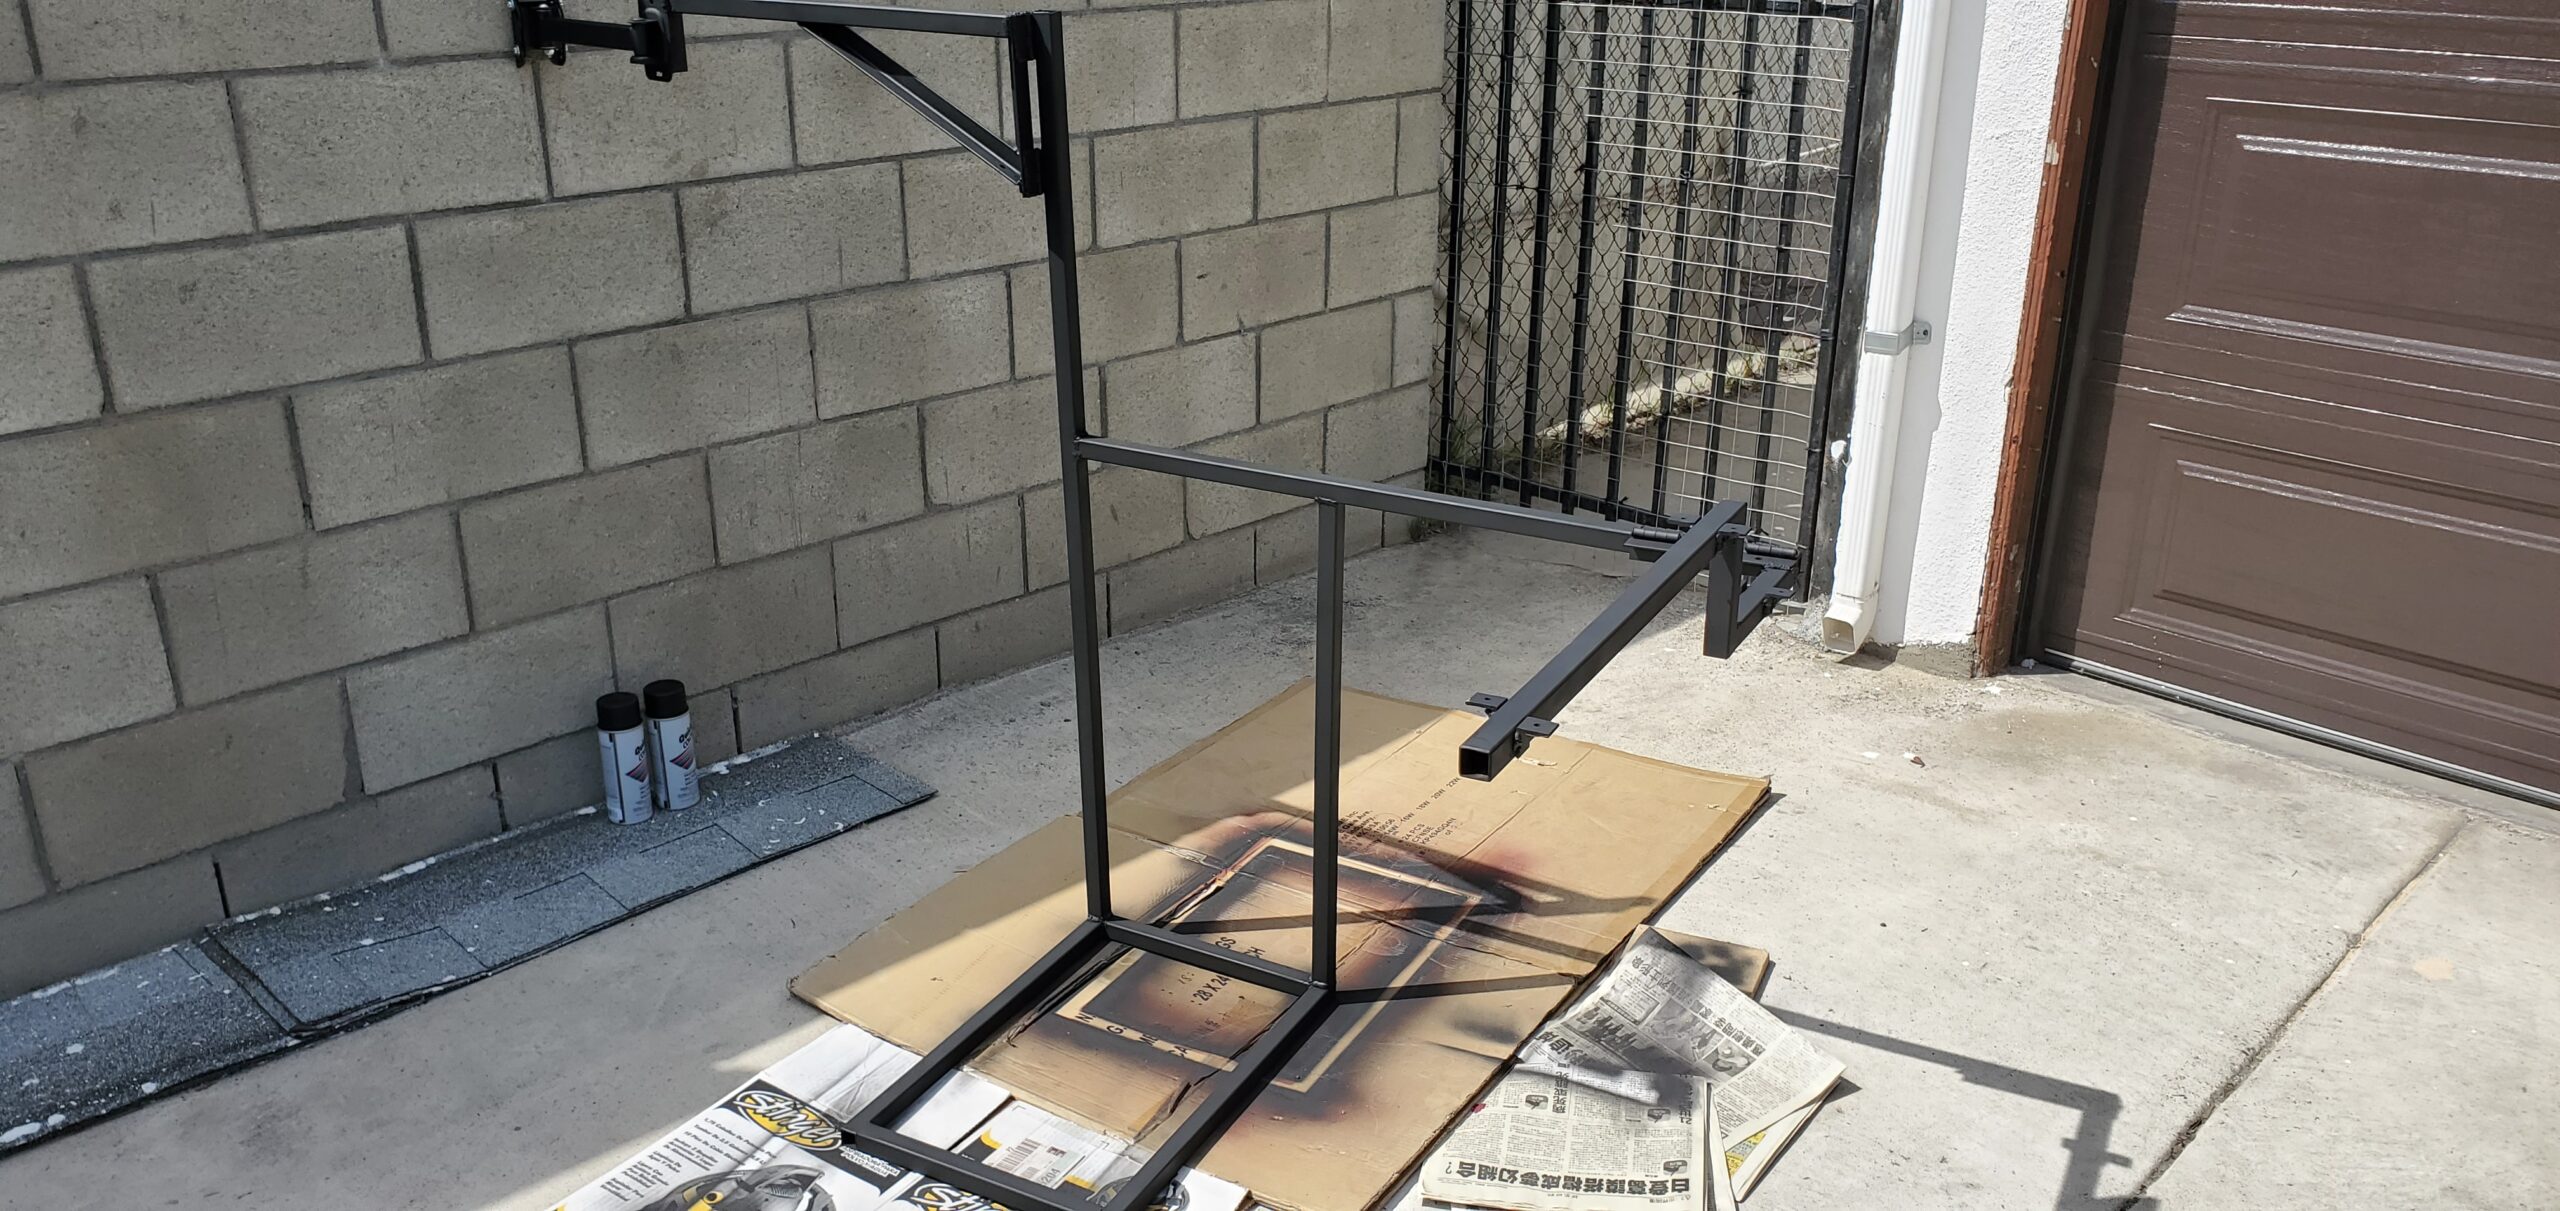
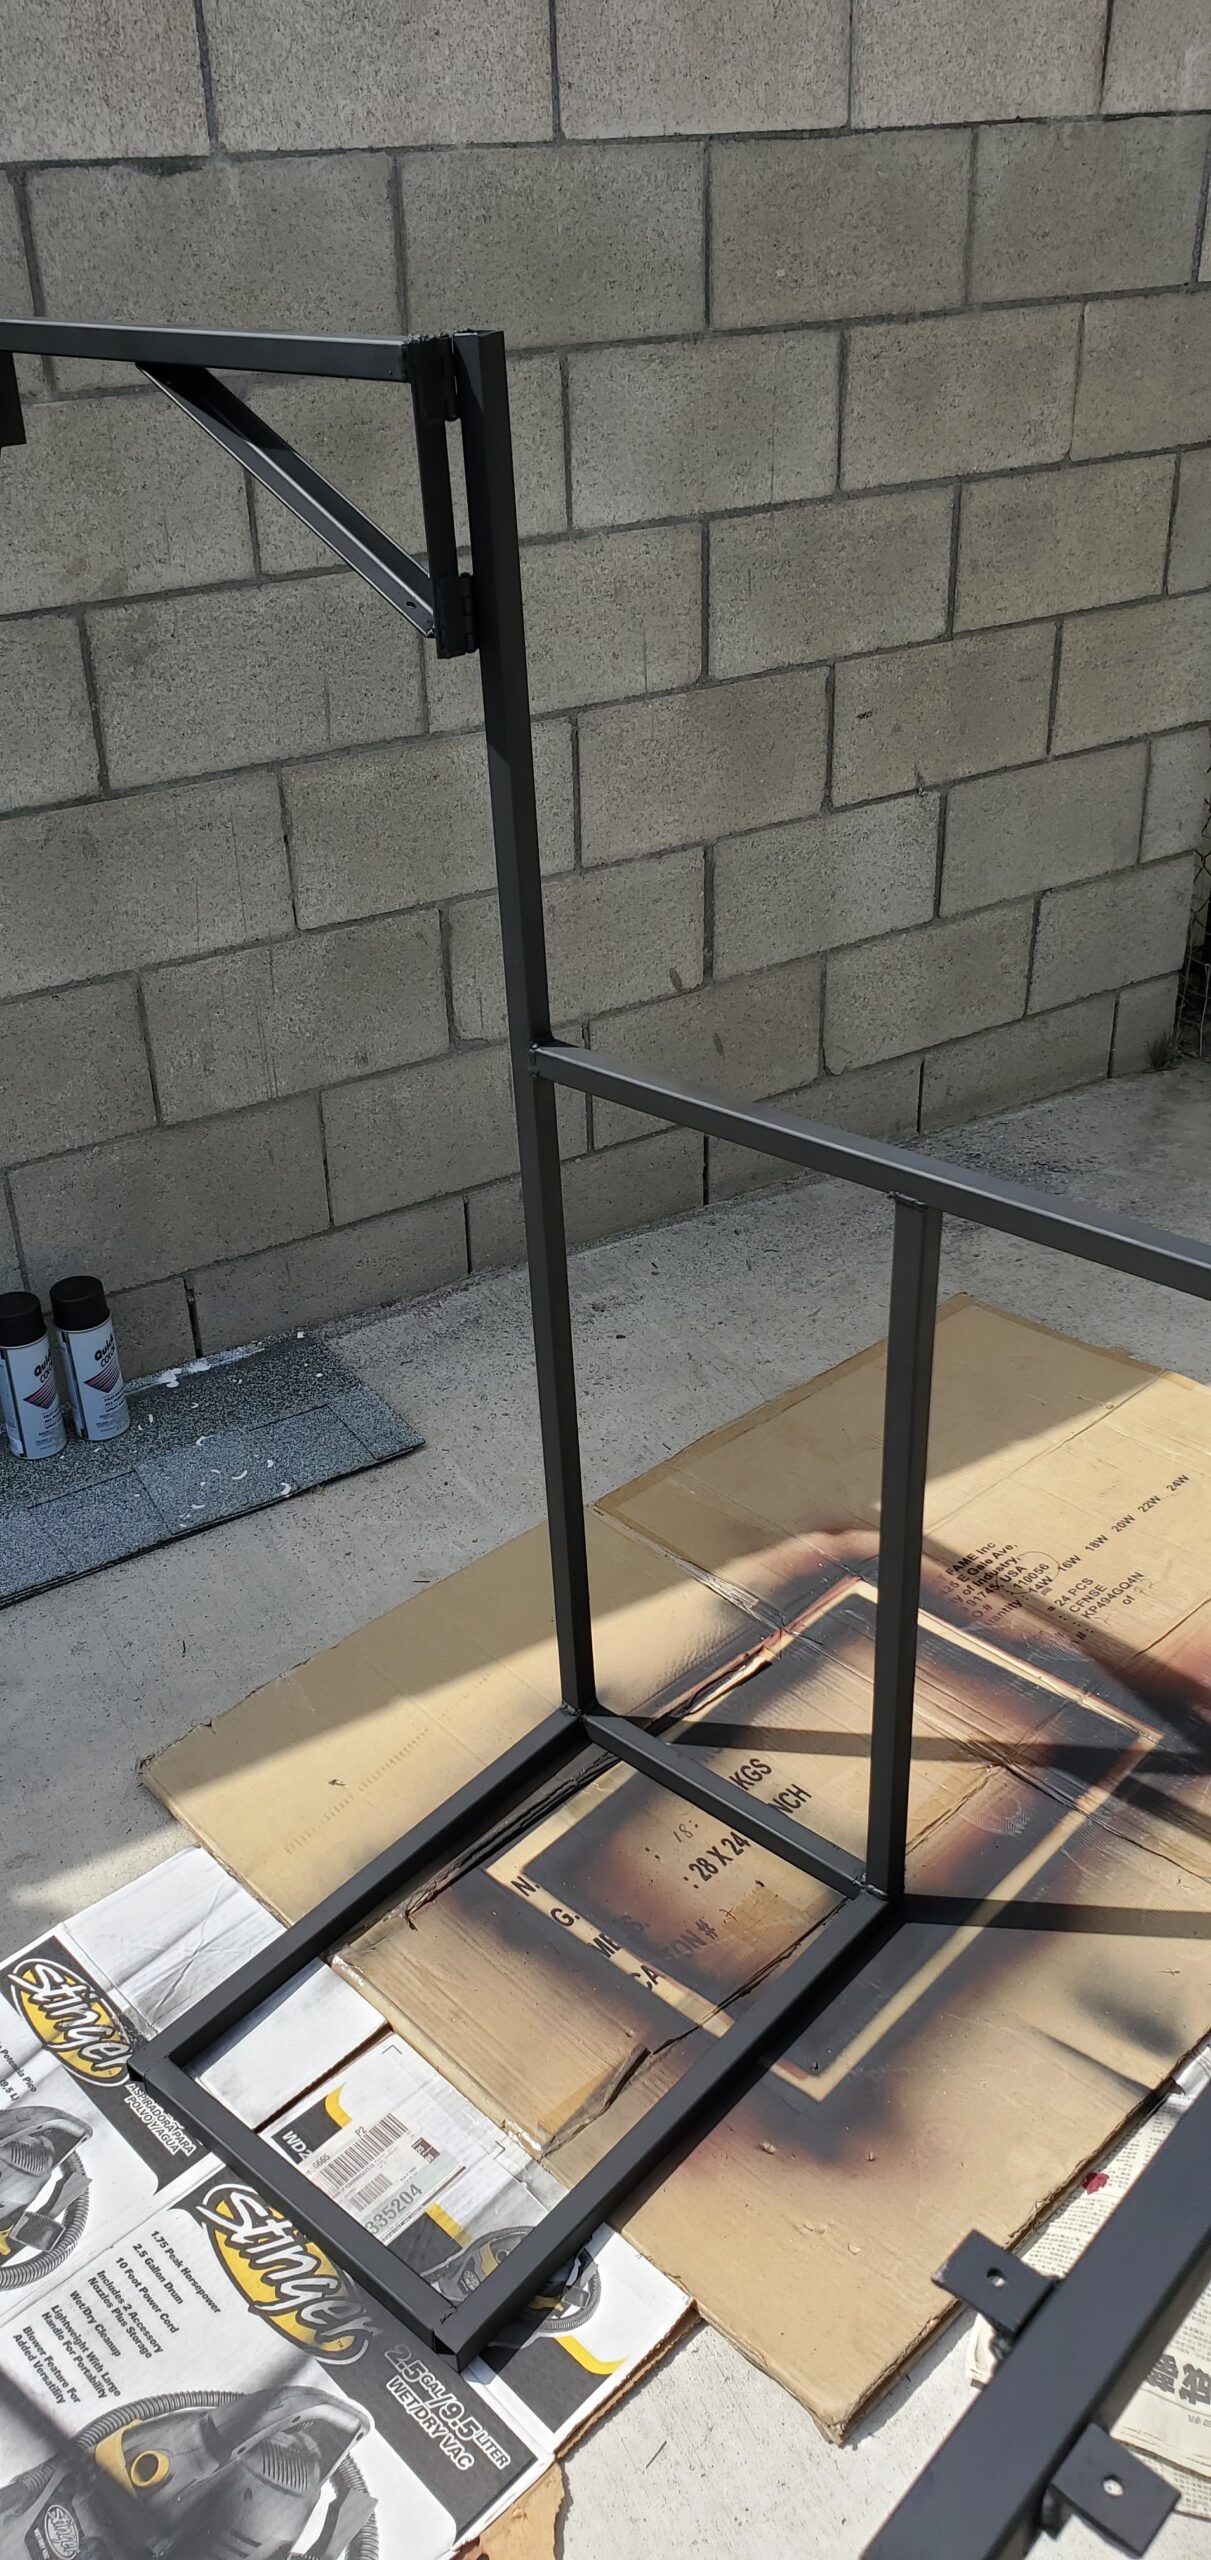
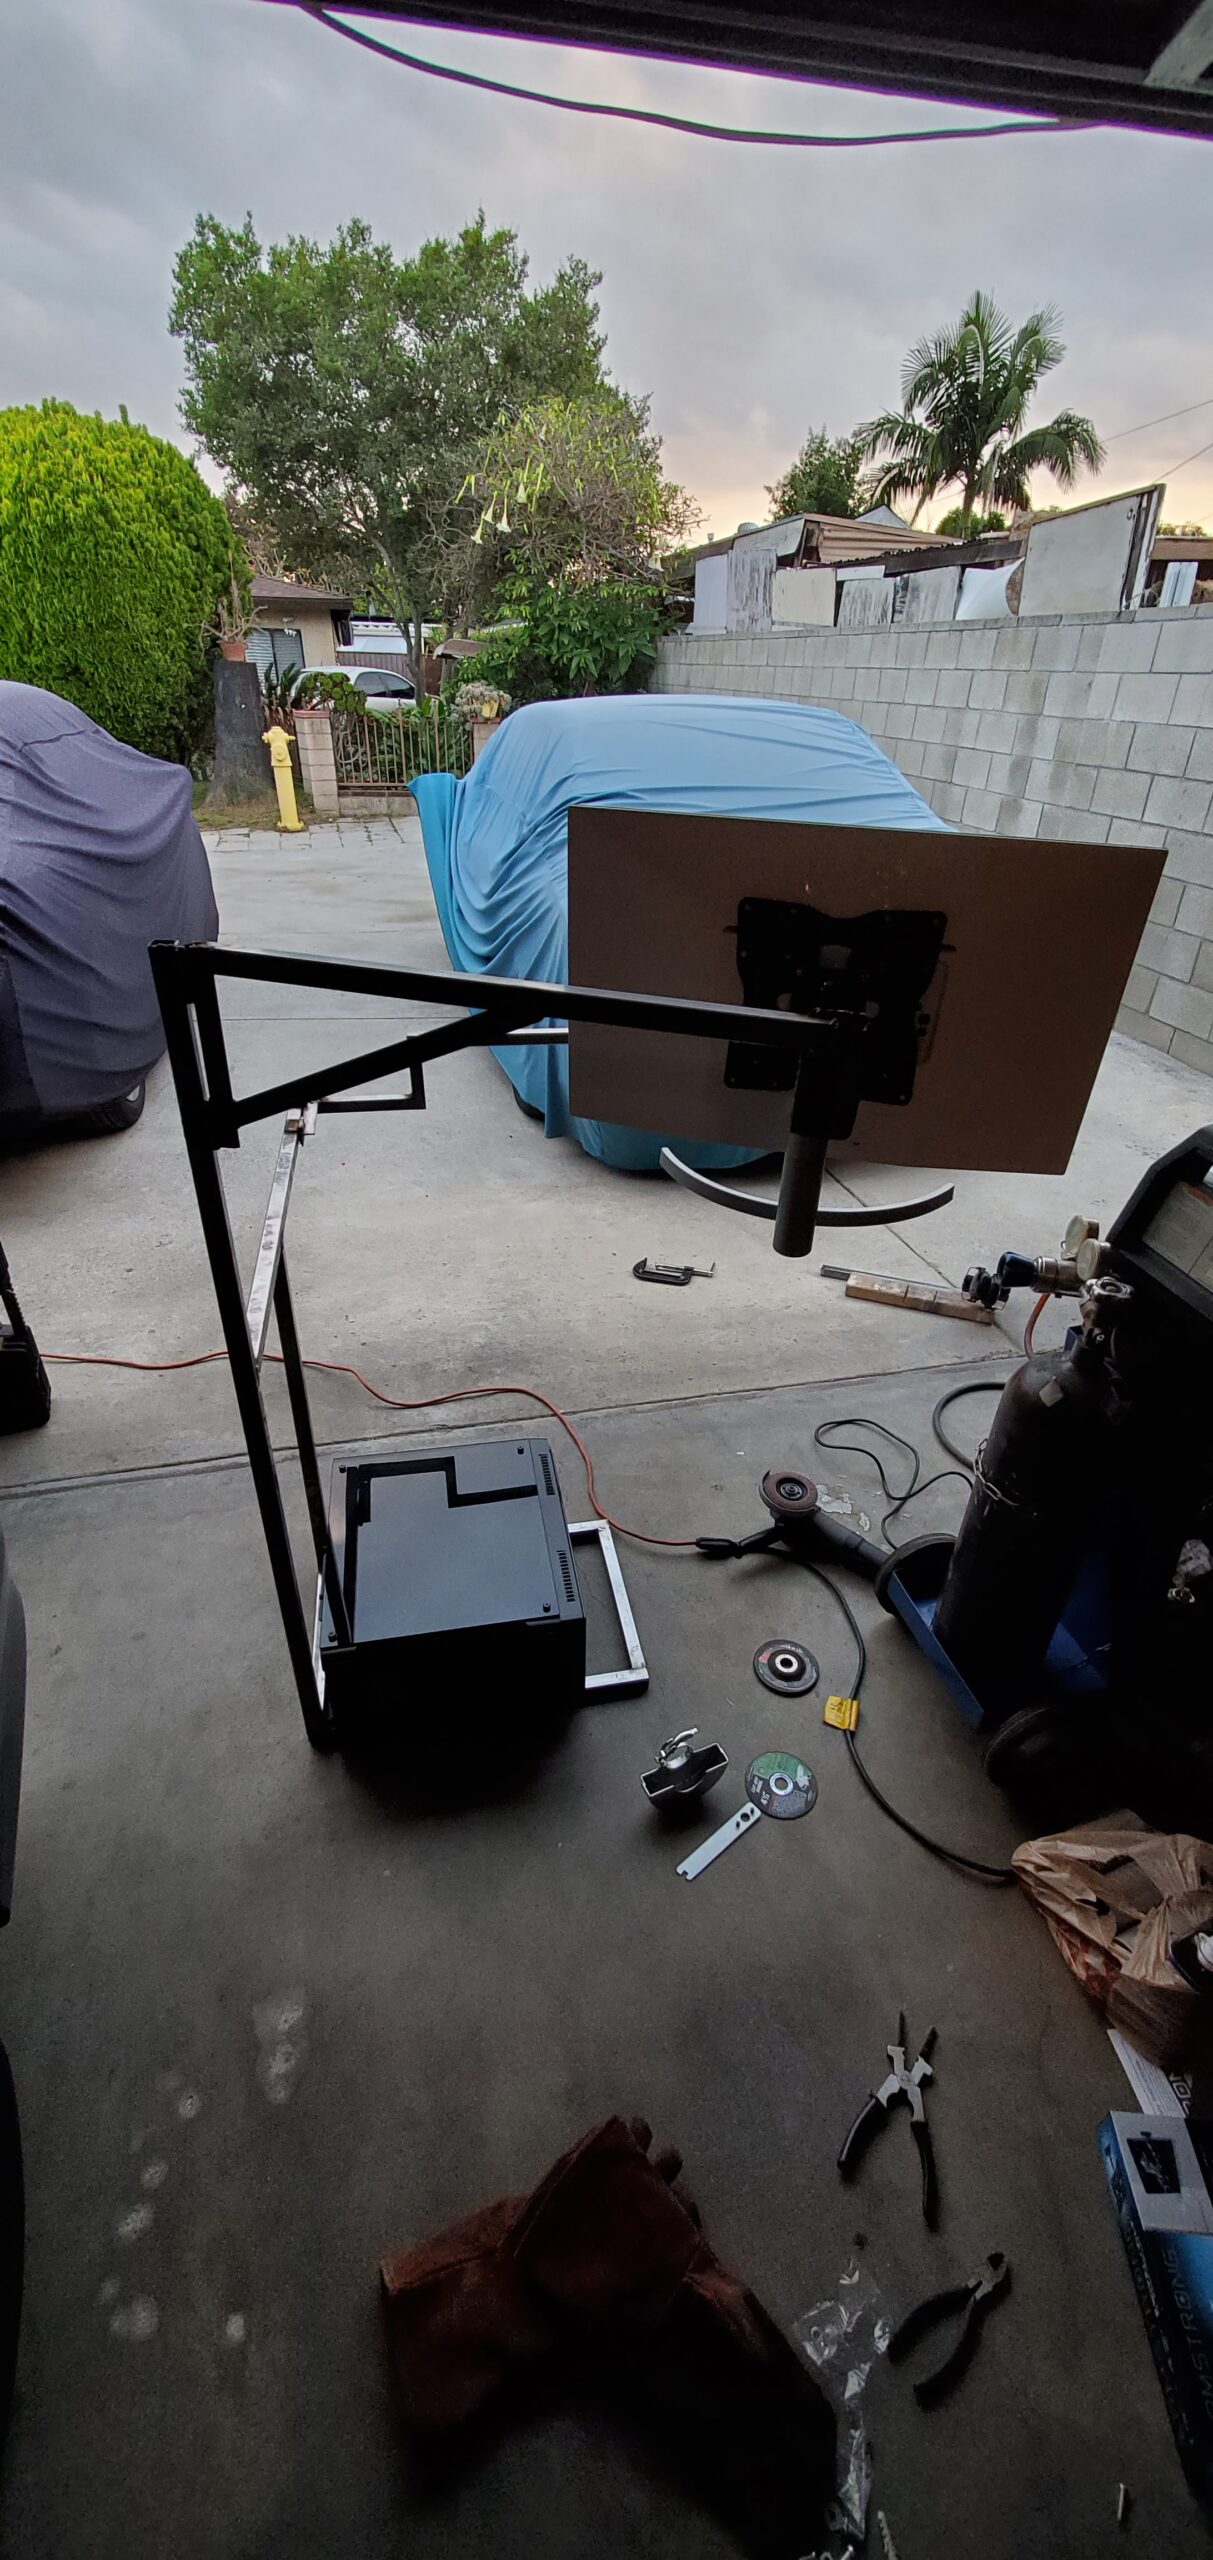
I bought a cheap vesa TV mount from harbor freight to weld to my DIY bedside desk. I made sure to first strip down the paint using an angle grinder a flap disc.

After everything was welded together, I primed the entire thing with Rust-Oleum's rusty metal primer. I then realized that I had forgotten to attach brackets for my keyboard and mouse platforms. This meant sanding down the primer to weld said brackets.
I made brackets from angled steel and welded it to the keyboard and mouse arm. Re-priming cost me a day of work.
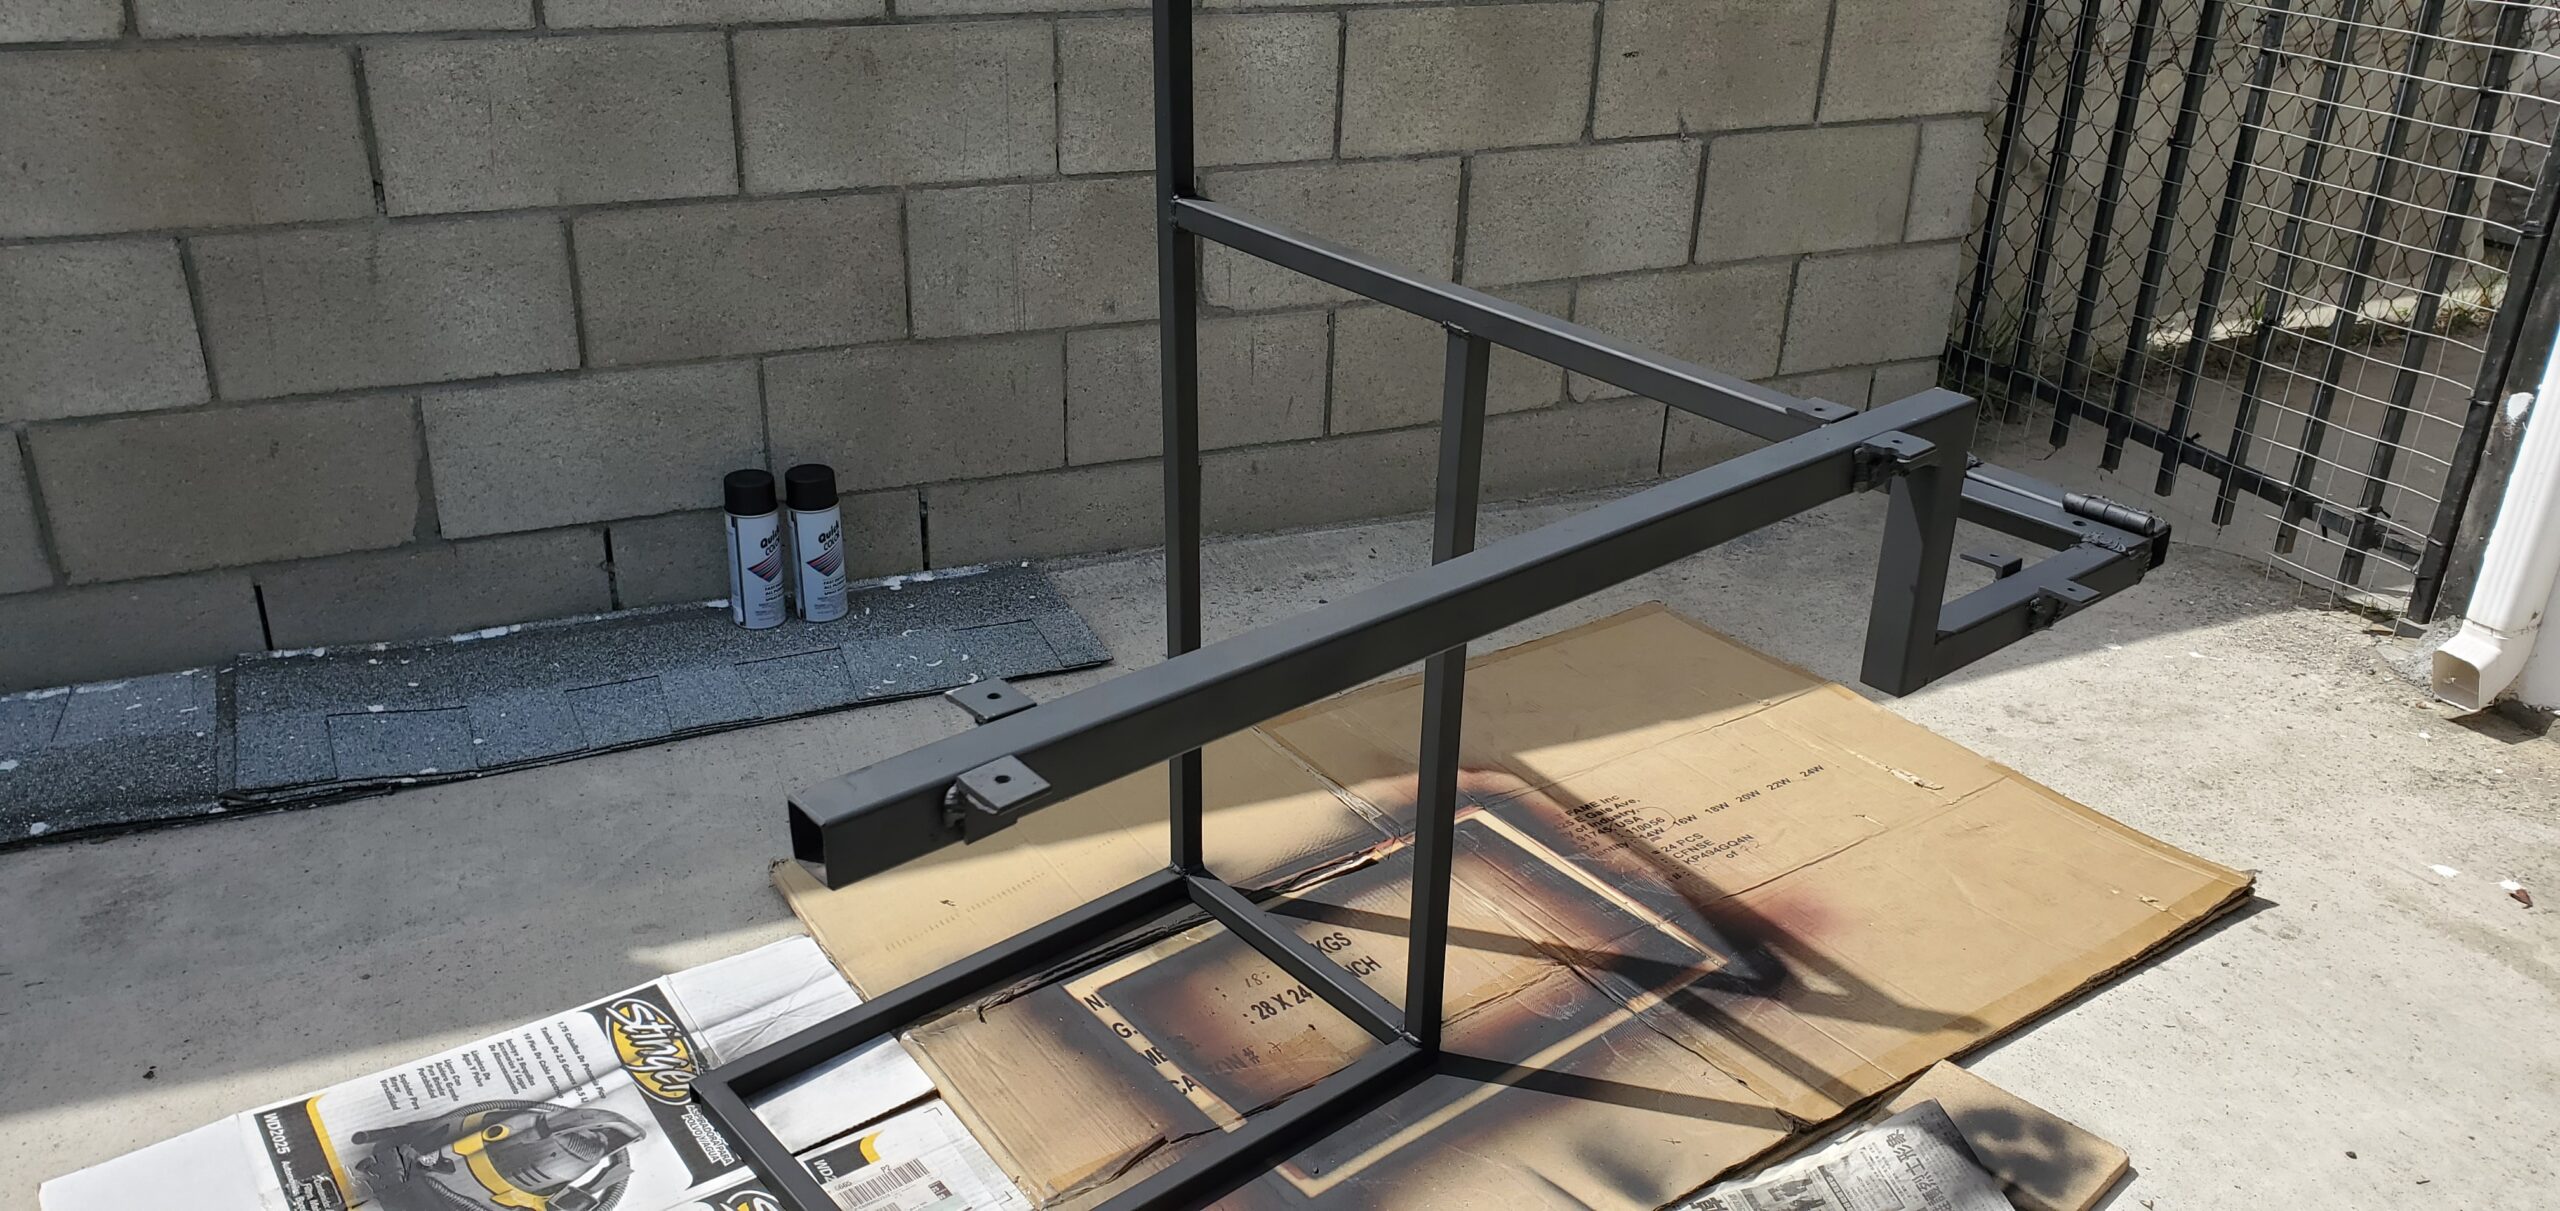
I was debating on painting the thing the colors of my logo but thought it would look ridiculous Not that a bed desk isn't already ridiculous. The obvious choice is black.
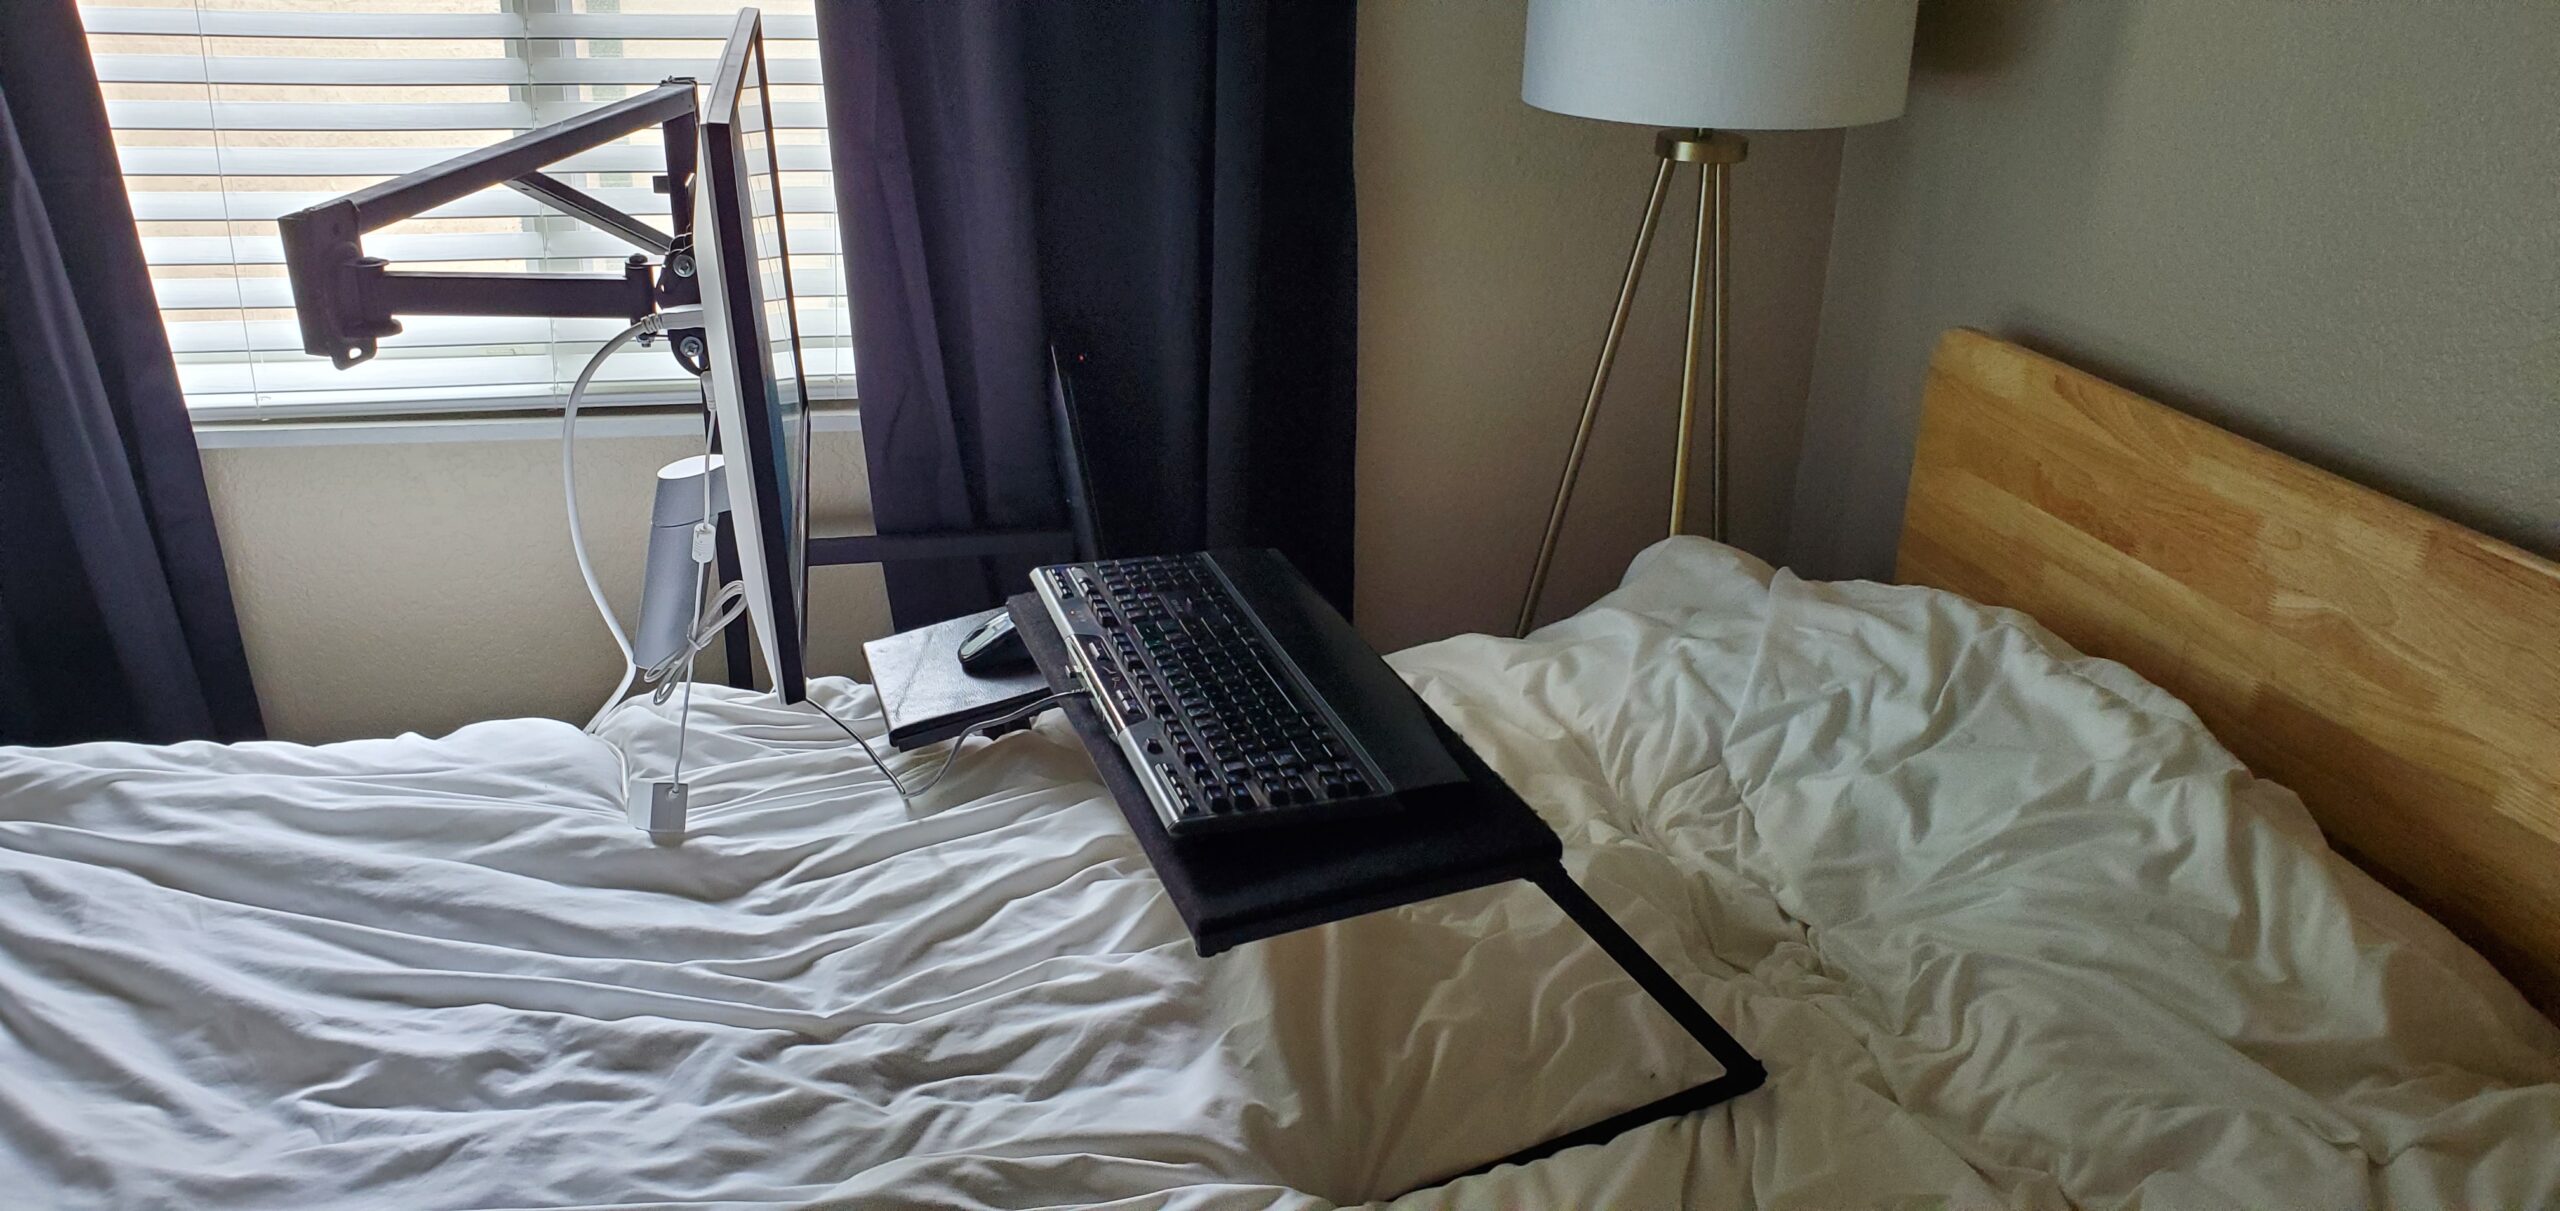
For the mouse and keyboard platform, I cut down spare MDF I had laying around. I wrap the mouse platform in leather and the keyboard platform in felt.

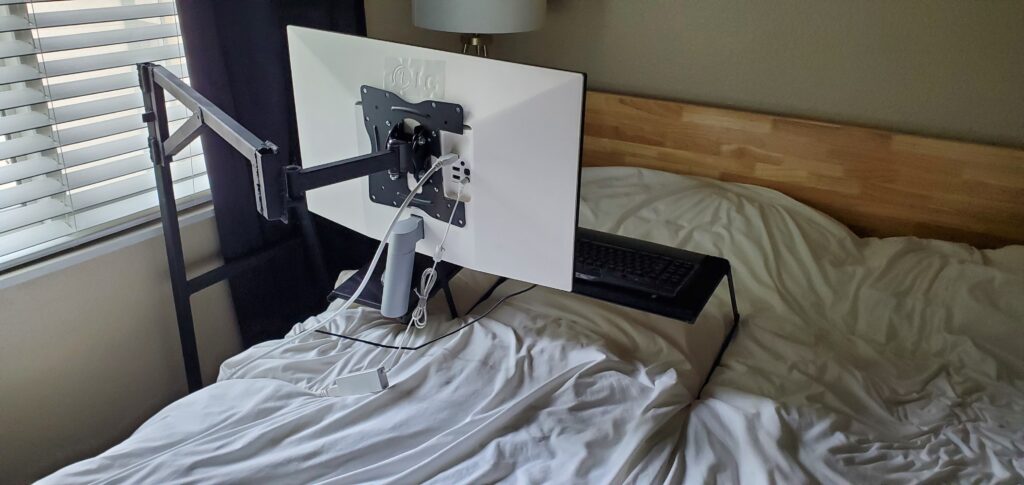
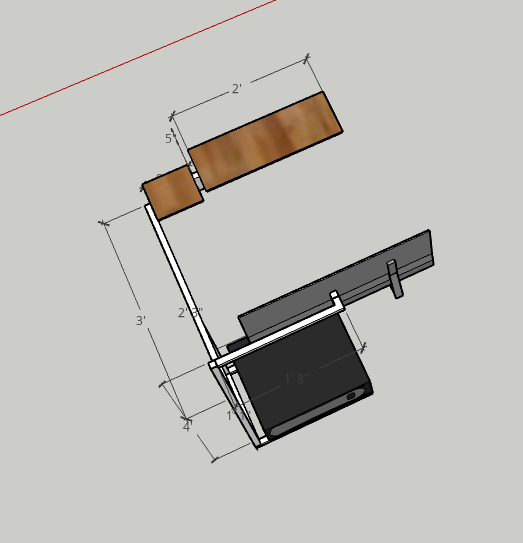
After everything was welded and painted, I decided that I prefer the mouse and keyboard platform separate so that I can move around more freely and not be stuck in the same position.
I guess you can call this version 3.
I made another run to Industrial Metal Supply for 3/4 steel flats and angles. Without any formal draw up, I pieced together the steel to replicate a laptop stand but sized for a keyboard and mouse.
With the keyboard and mouse arm cut off from my bedside desk, I had to weld on an extra leg at the base for the monitor arm when extended outwards. The project became less attractive looking but it functions for my purpose.
Overall, the project took me a few days. Mainly because I wasn't sure how stable this design would be so I did not purchase all the materials needed.
The final results of my bedside desk is more of a fancy monitor stand after all of the changes I made. I'm happy with the results since I can go back to using my desktop.
I also made a video for this build but with all the changes, it doesn't really make sense to post it. My Sony kit lens was destroyed while grinding steel. It will have died in vain.
If I were to do this project again, I would choose to instead use 1-1/2" square tubing instead. Or I would integrate 1x2" rectangular tubing in parts of the build. I believe these changes would make the stand a lot stronger.


Check out my other projects here.